Why Chocolate Sorbet Is a Great Healthy Dessert
Chocolate sorbet stands out as a fantastic healthy dessert option, and I think you’ll love it just as much as I do. It’s rich and satisfying yet surprisingly low in fat compared to traditional ice creams.
The dark chocolate provides antioxidants, making it a guilt-free indulgence. Plus, it’s dairy-free, perfect for those with lactose intolerance or anyone seeking a lighter treat.
I find its intense flavor surprisingly invigorating, especially on hot days. The best part? You can whip it up quickly at home, customizing it to your taste.
Treat yourself to chocolate sorbet, and you won’t regret it!
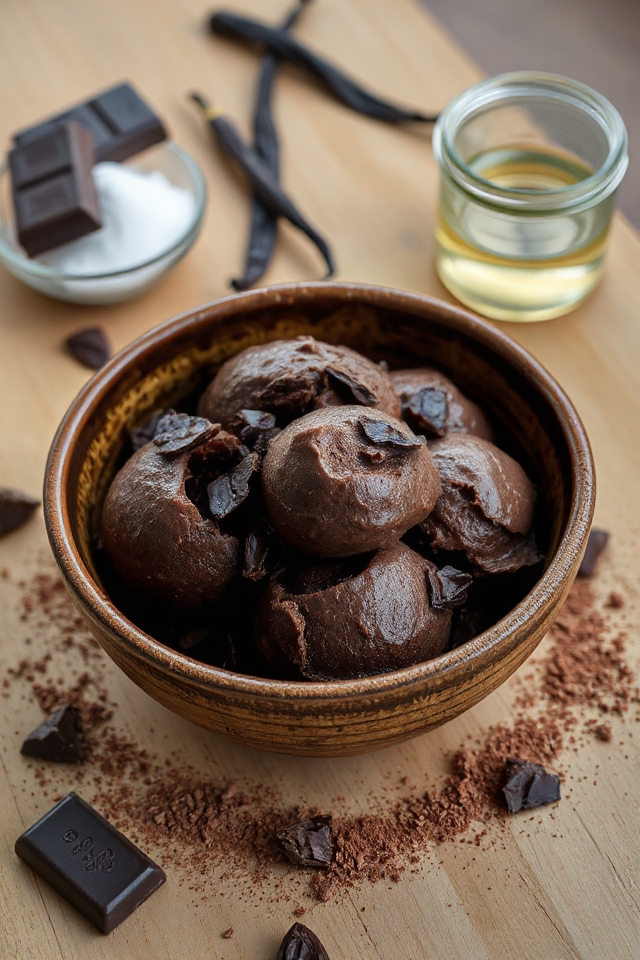
Ingredients of Chocolate Sorbet
When you’re in the mood for something sweet, rich, and oh-so-chocolatey, chocolate sorbet is the way to go. It’s not just a treat; it’s an experience. Imagine indulging in a dessert that’s both invigorating and deeply satisfying, all while knowing it’s a healthier option compared to traditional ice cream.
Plus, you can make it right at home with just a handful of ingredients. So, let’s gather what we need for this luscious delight, shall we?
Ingredients to Make Chocolate Sorbet:
- 1 teaspoon vanilla extract
- 3/4 cup sugar
- 1 tablespoon sugar
- 3 tablespoons corn syrup
- 6 ounces dark chocolate, chopped into half-inch pieces (61 to 65 percent cocoa solids)
- 4 ounces Dutch-processed cocoa powder (approximately 1 cup)
Now, before you plunge into the kitchen, here are a couple of things to keep in mind about these ingredients.
First off, the quality of your dark chocolate really matters. Go for chocolate that you’d happily munch on by itself—because if it’s good enough to eat as is, it’ll make your sorbet that much better.
As for the cocoa powder, Dutch-processed is key here; it gives that smooth, rich flavor you want.
Finally, don’t skip the vanilla extract if you can; it adds a lovely depth to the sorbet that rounds out all that chocolate goodness. Trust me, your taste buds will thank you.
Ready to get started? Let’s make some chocolate magic!
How to Make Chocolate Sorbet
Making chocolate sorbet might sound like a fancy endeavor, but trust me, it’s easier than it seems. To kick things off, you’ll need to make a syrup base. Grab that 1 teaspoon of vanilla extract, and if you’re feeling ambitious, a whole vanilla bean. If not, no worries—just stick with the extract.
Grab a heavy-bottomed saucepan, and slice the vanilla bean down the center with a paring knife, scraping out those tiny little seeds. Toss those seeds, along with 2 1/4 cups of water, 3/4 cup of sugar, and 3 tablespoons of corn syrup, into the saucepan. Bring everything to a rolling boil over medium-high heat. Once it starts bubbling away, turn off the heat and let it steep for about 15 minutes. Your kitchen will smell heavenly, and you might find yourself wondering why you don’t make this more often.
While the syrup is steeping, let’s tackle the chocolate. You’ll need 6 ounces of dark chocolate, chopped into half-inch pieces—aim for chocolate that’s 61 to 65 percent cocoa solids because that’s where the magic happens.
In a medium-sized bowl, combine the chopped chocolate with 4 ounces of Dutch-processed cocoa powder, which is about a cup. Once your syrup has steeped and cooled a bit, gently whisk in one-third of that luscious concoction to the chocolate mixture. You might notice it seizing a little, but don’t panic; that’s just the chocolate being dramatic.
Gradually whisk in the rest of the syrup, in two parts, until you have a shiny, thick, and smooth mixture—this should take about four minutes. Now, here’s where the finesse comes in: strain the mixture through a fine-mesh strainer to get rid of any lumps, then cool it in an ice bath. Let it chill in the fridge for at least four hours, or even up to a week if you want to plan ahead.
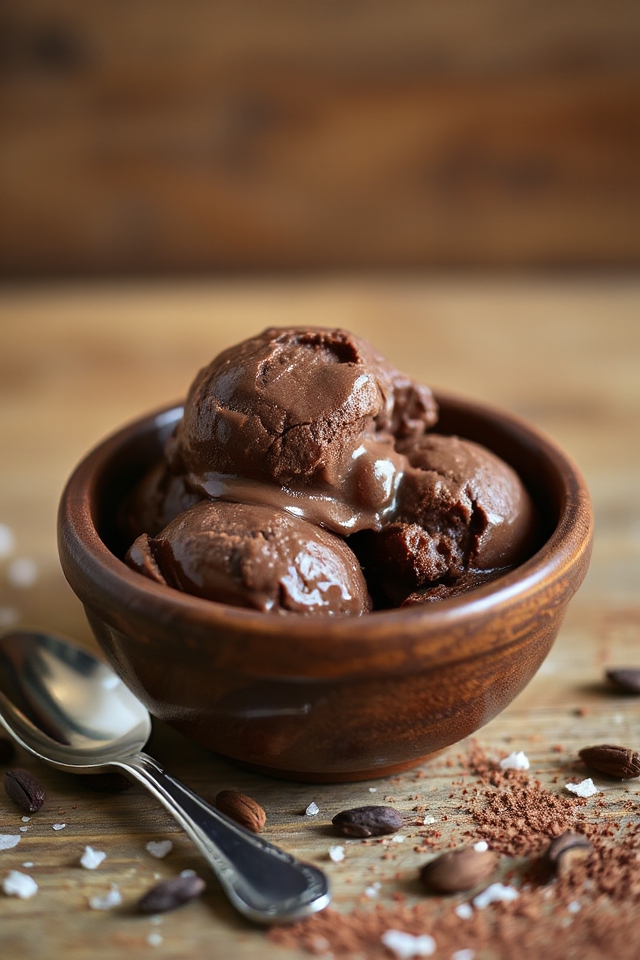
Finally, it’s time for the fun part: churning! If you have an ice cream machine, pour in your chocolate mixture and churn according to the manufacturer’s directions. You’ll know it’s done when it has increased in volume and holds those lovely whisk lines—like soft whipped cream but chocolatey.
Once it reaches that dreamy consistency, transfer it to the freezer for about four hours. And voilà, you’ve made chocolate sorbet! Honestly, is there anything better than scooping out a bowl of this velvety treat? Just don’t blame me if you end up eating it all in one sitting.
Chocolate Sorbet Substitutions & Variations
If you’re looking to mix things up with your chocolate sorbet, there are plenty of substitutions and variations to explore.
For a creamier texture, try adding a splash of coconut milk or almond milk instead of water. If you want to enhance flavor, swap the dark chocolate for milk chocolate or even white chocolate for a different twist.
Feeling adventurous? Incorporate spices like cinnamon or chili powder for a kick. You can also infuse your syrup with espresso or mint for a rejuvenating change.
The possibilities are endless, so don’t hesitate to get creative and make it your own!
What to Serve with Chocolate Sorbet
While chocolate sorbet is a delightful treat on its own, pairing it with complementary flavors can elevate your dessert experience.
I love serving it alongside fresh berries, like raspberries or strawberries, which add a tart contrast. A sprinkle of sea salt enhances the rich chocolate flavor beautifully.
You could also serve it with a dollop of whipped cream or a scoop of vanilla ice cream for a creamy texture. For a more indulgent touch, drizzle some chocolate or caramel sauce over the sorbet.
Each of these options creates a delightful balance that’ll satisfy any sweet tooth!
Additional Tips & Notes
Pairing chocolate sorbet with fresh berries or a drizzle of sauce can enhance its flavor, but there are some additional tips that can help you achieve the best results.
First, use high-quality dark chocolate for a richer taste. If you want a smoother texture, don’t skip the straining step after whisking the syrup and chocolate together.
For extra creaminess, consider adding a splash of coconut milk before churning. Remember to let the sorbet sit at room temperature for a few minutes before serving; it makes scooping much easier.
Finally, always keep it tightly sealed in the freezer to maintain freshness.